How OEM NTC Thermistor Probes Help Prevent HVAC and Smart Appliance Failures
Feb 01, 2026
A temperature sensor is a small part, but when it goes wrong, the damage can spread fast. In real-world deployments, one inaccurate sensor can trigger field failures, customer complaints, returns, and...
How OEM NTC Thermistor Probes Help Prevent HVAC and Smart Appliance Failures
A temperature sensor is a small part, but when it goes wrong, the damage can spread fast. In real-world deployments, one inaccurate sensor can trigger field failures, customer complaints, returns, and expensive service campaigns. For distributors, system integrators, and retail chain buyers, that risk is very practical. This article walks through how OEM NTC thermistor probes work, why they matter in HVAC and smart appliances, and what to look for when selecting and validating them.
A Common Issue in the Air Conditioning Business
Imagine an industrial air conditioner brand that has a rough summer season. Customers report freezing coils, water leaks, and units that seem to run nonstop. After inspection, the major components look fine. The root cause turns out to be a small temperature sensor inside the system.
Because the sensor feeds temperature data to the control board, a bad reading can push the logic in the wrong direction. If the board thinks the room is still warm, it may keep the compressor running longer than it should. Cooling coils drop below the safe range, ice builds up, and the system eventually leaks when that ice melts. In cases like this, the fix is often a sensor replacement across affected units. If the buyer had specified a properly validated OEM NTC thermistor probe in the first place, the risk of this chain reaction would be much lower.
What an NTC Thermistor Is
NTC stands for Negative Temperature Coefficient. A thermistor is a resistor whose resistance changes with temperature. The “negative” part means the direction is opposite to what you might guess at first.
When temperature goes up, resistance goes down. When temperature goes down, resistance goes up.
A control board cannot “feel” heat directly. What it can do is measure electrical behavior. It drives a small current through the thermistor, reads the resistance, and then converts that resistance into a temperature value in software.
What’s Inside the Sensor
NTC thermistors are not made from standard metal wire. They are typically made from ceramic semiconductor materials based on metal oxides. Common ingredients include manganese, cobalt, nickel, and copper oxides.
In basic terms, manufacturers blend these materials into a powder, press the powder into a small shape (often a bead or disc), and then fire it at high temperature in a process called sintering. After sintering, the ceramic becomes a stable solid. Leads are attached so the component can connect to wiring and, eventually, a control board.
Why Resistance Changes With Heat
The behavior comes down to how charge carriers move inside the ceramic. At lower temperatures, electrons are less mobile, which makes resistance higher. As temperature rises, the material gains energy and electrons move more easily. Current flows with less opposition, so resistance drops. The control board sees that change and interprets it as a temperature increase.
Why HVAC and Smart Appliances Need Better Sensors Than You Think
HVAC systems often run for long hours and control large spaces. Small errors can lead to comfort issues, energy waste, or unnecessary cycling. Even a modest measurement offset can cause the system to run longer than needed, which shows up in operating cost and wear.
Smart appliances have their own failure modes. Refrigerators depend on timely, stable feedback to keep food in a safe range. If a sensor responds too slowly, the system can overcorrect. If it reads incorrectly, compressors can run too long, causing freezing, or not long enough, risking spoilage. For integrators, it’s less about “having a sensor” and more about using the right OEM NTC probe with known performance and predictable behavior.
Epoxy-Coated vs Glass-Coated Thermistors
The thermistor element needs protection. Moisture, contamination, and harsh environments can damage the ceramic and shift readings over time. Two common protection approaches are epoxy coating and glass coating.
Epoxy coating
Epoxy is a hard plastic coating used widely because it’s cost-effective and can respond quickly due to its thin layer. The tradeoff is temperature and environmental limits. Epoxy-coated probes are generally suited for normal operating environments such as room air conditioners, washing machines, and many consumer smart devices. Depending on design, they are often used up to around 150°C, but the exact limit depends on the specific component and assembly.
Glass coating
Glass-coated thermistors are sealed in a small glass bead. Glass offers strong protection against water, oil, and many chemicals, and it typically tolerates higher temperatures than epoxy. These are more common in harsher conditions such as industrial heating equipment, heavy-duty HVAC applications, and high-moisture environments. Some designs are rated to higher ranges (often cited around 250°C to 300°C), but buyers should rely on the supplier’s datasheet and validation results for the exact rating.
How to Use the Beta Value Correctly
Datasheets usually list a Beta value (in Kelvin). Beta describes how steeply resistance changes with temperature. Higher Beta generally means the resistance changes more per degree, which affects sensitivity and the conversion curve used by your control board.
This is where integration mistakes happen. The control board’s firmware expects a specific thermistor curve. If the board is designed for a Beta of 3950 but the installed part behaves like 3435, the temperature calculation will be off across the working range. The sensor itself may still be “working,” but the system will make the wrong decisions because the math no longer matches the hardware.
Resistance Tolerance and Why It Matters
Another key line item is resistance tolerance, often shown as 1%, 3%, or 5% at 25°C. This tells you how close the thermistor is to its nominal resistance value at that reference temperature.
For simpler appliances, wider tolerance may be acceptable. For systems that aim for tighter temperature control, energy efficiency, or consistent behavior across large deployments, narrower tolerance can reduce variation between units. In practice, the right tolerance depends on your system’s control logic, error budget, and performance requirements.
A Simple Facility Test Before You Place a Big Order
Before committing to volume, it’s smart to test incoming probes in-house. Here’s a practical method you can run with basic tools:
-
Prepare a digital multimeter, a reliable digital thermometer, and a container of room-temperature water.
-
Connect the multimeter leads to the thermistor’s two wires.
-
Set the multimeter to measure resistance (Ohms).
-
Place both the thermistor and the thermometer into the water.
-
Wait a few minutes for the temperature to stabilize.
-
Record the thermometer temperature.
-
Record the resistance reading from the multimeter.
-
Check the supplier’s Resistance-Temperature (R/T) chart for that part.
-
Find the recorded temperature on the chart.
-
Compare the chart value to your measured resistance.
If your results align within the expected tolerance, you have a stronger signal that the batch is consistent and the datasheet curve matches reality.
Questions System Integrators Should Ask Suppliers
A good probe is more than a thermistor element. The full assembly affects durability, response time, and installation quality. Before purchasing, it helps to ask about a few practical areas.
Wire length and insulation
PVC insulation may be fine for typical indoor equipment. For higher temperatures or chemical exposure, materials like PTFE (commonly called Teflon) are often preferred. The key is to match the insulation to the environment, not just the price.
Housing and mounting style
The housing is the shell around the sensing element. Copper housings can transfer heat quickly. Stainless steel is more rugged and corrosion-resistant. Your choice should reflect how the probe is mounted and what it touches during operation.
Batch consistency and QC documentation
When you’re buying at scale, unit-to-unit variation becomes a system-level problem. Ask what controls are in place and what testing reports can be provided. Consistency matters just as much as the headline specs.
One Practical Rule for Your Next Order
Match the probe form factor to the surface you’re measuring.
If you are measuring water temperature inside a pipe, use a probe designed to be installed in that pipe, such as a threaded metal style, so you get solid thermal contact. If you are measuring a flat plate, use a mounting style that sits flush, such as a ring-lug that can be bolted down. Poor contact creates an air gap, and air slows heat transfer. The sensor reacts late, the control loop reacts late, and that delay can show up as instability, icing, overrun, or other field issues.
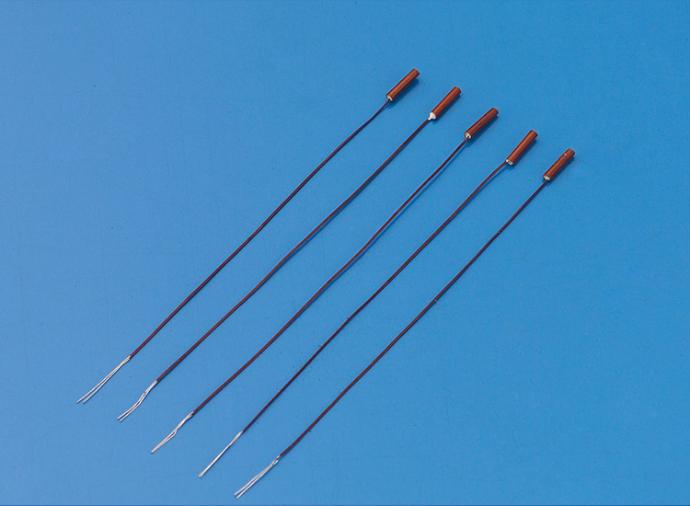
NTC Thermistor Probes Supplier Reference
Sen Tech as a manufacturer of custom OEM NTC thermistor probes. If you are evaluating suppliers, treat this as one example and apply the selection framework above: confirm the thermistor curve, validate tolerance and stability, verify environmental ratings for coating and wiring, and request batch-level QC evidence before scaling up.
Conclusion
NTC thermistor probes are small parts that sit at the center of many HVAC and smart appliance control loops. When the sensor curve, tolerance, packaging, or environmental protection doesn’t match the application, the system may still “run,” but it can make the wrong decisions and fail in costly ways. Choosing the right probe is mostly about matching specs to firmware expectations, validating real performance, and ensuring consistency at scale.
Next steps you can take before your next purchase:
-
Map your control board’s expected thermistor curve (R25, Beta, or full R/T table) and require an exact match.
-
Choose coating, wire insulation, and housing based on the actual environment (temperature, moisture, chemicals, mounting).
-
Run a simple incoming inspection test using water-bath resistance checks against the supplier’s R/T chart.
-
Ask for batch consistency controls and QC documentation, especially for large-volume orders.
-
Verify the mechanical fit so the probe makes good thermal contact and doesn’t introduce air gaps or slow response.